The New Generation Atlas Tilelight is moulded from one piece of opal polycarbonate plastic to completely eliminate the possibility of leaks due to corrosion or defective metal soldering. Uniformity and quality control is achieved though machine repeatability and inspection staff working to AS2080-1983 standard.
Polycarbonate Skylight Features
- Built to withstand AS2424-1981 (the 25kg sandbag drop test) to give complete protection against hail damage and protection from persons on roofs against accidentally falling through skylights. A must for schools and public utilities.
- The new opal polycarbonate is specially formulated to Atlas Skylights requirements – it is not single but double coated to give maximum protection against ultra violet radiation.
- Polycarbonate has the lowest fire rating of all glazing plastics.
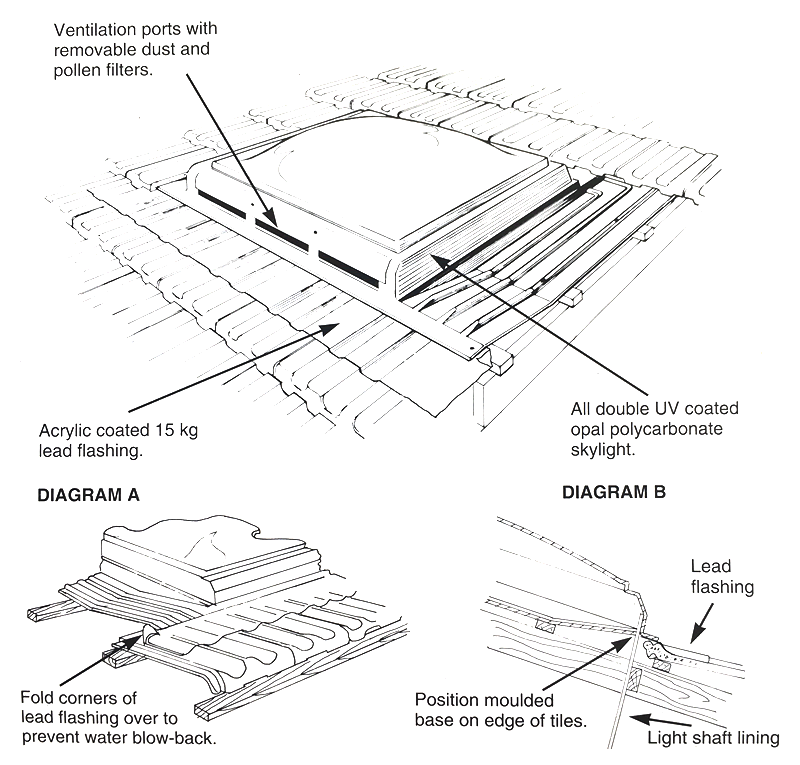
- All Altas New Generation Ventilated Skylights are now equipped with removable dust and pollen filters on ventilation ports.
- Atlas Skylights use only 15kg Acrylic Coated lead flashing which will not harm gutters and prevents lead contamination in stored rainwater runoff.
- Designed to suit all cement and terracotta tile roofs.

Skylight Installation Instructions
For existing buildings, survey the inner roof for obstructions (electrical wires, water pipes, etc.)
Step 1. Remove the tiles and sarking from the area where the skylight is to be installed. (Remember, tiles can slide off the roof if not secured). Cut out the tile battens flush with the rafters as required.
Step 2. Place the Tilelight in position, making sure the lead flashing is fitted as detailed in diagrams A and B. Make sure all the existing tile battens are firmly secured, then drill 6mm clearance holes through the raised moulded ribs and fix with 4 mm Tek screws to battens below.
Step 3. Replace the tiles, compressing the foam water and dust sealing strips onto the Tilelight base. You will find some tiles will need to be cut in half and some will need small nibs on the underside removed to allow them to sit flat. Grout tiles with cement as necessary.
Step 4. You are now ready to start framing the light shaft. Determine the size of opening you require at the ceiling level. This should not be larger in width than the ceiling rafters, unless special nogging is provided. Cut out lining and frame up to Tilelight as shown.
Step 5. Select your lining material. Plaster Board, Wallboard, or Particle Board are recommended.